Skip to content

Easy DIY Fall Nail Designs for Short Nails

    Saying goodbye to long summer nights and hello to cozy times by the fire, means that there’s a change of season. You can reflect this change of season perfectly on your talons by painting them in the appropriate shades and designs. From candy corn dotticures to falling leaves and beautiful jewel tone nail polishes – there is a design here for everyone. So, if you want to feel like the Queen of Autumn – then check out these Fall Nail Designs that are completely inspired by all things cozy.

    Essential Tools for DIY Nail Art

    To start your DIY nail art journey, gather a few basic yet essential tools:

    – Nail polish: Have a variety of colors including base coats and top coats.

    – Fine-tip brushes: Crucial for detailed designs and intricate patterns.

    – Dotting tools: These are perfect for creating dots of various sizes and can be used in designs like the candy corn dotticure.

    – Sponges: Useful for creating ombre effects or soft color transitions.

    – Nail decals or stickers: These can offer a quick way to add patterns like leaves or geometric shapes.

    – Nail stamping kits: These kits are great for adding textures or patterns such as sweater designs or leopard prints.

    – Tweezers: Helpful for placing decals or handling small decorations.

    Assembling these tools will prepare you to execute any nail design idea with precision and creativity.

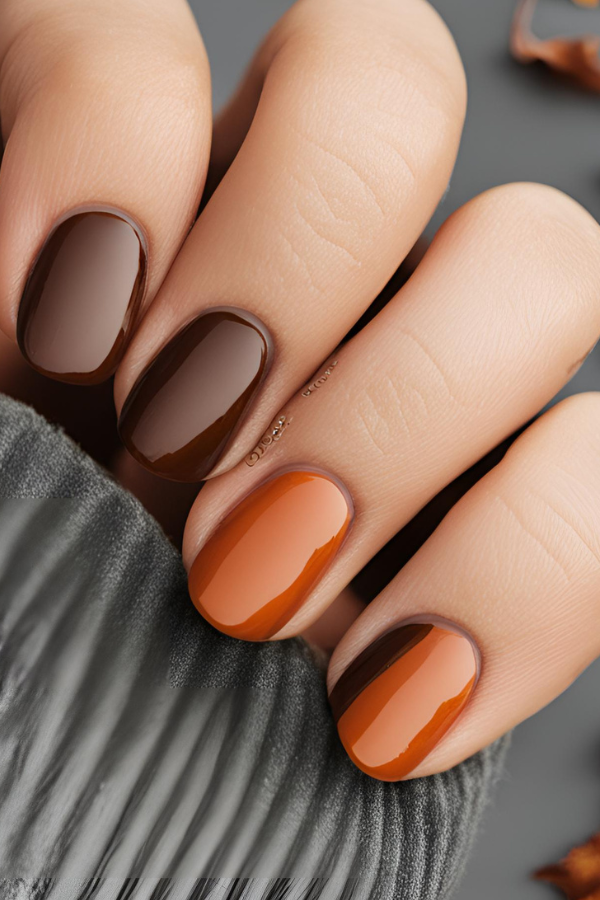
    1. Warm Autumnal Tones

    10 Stunning Fall Nail Designs
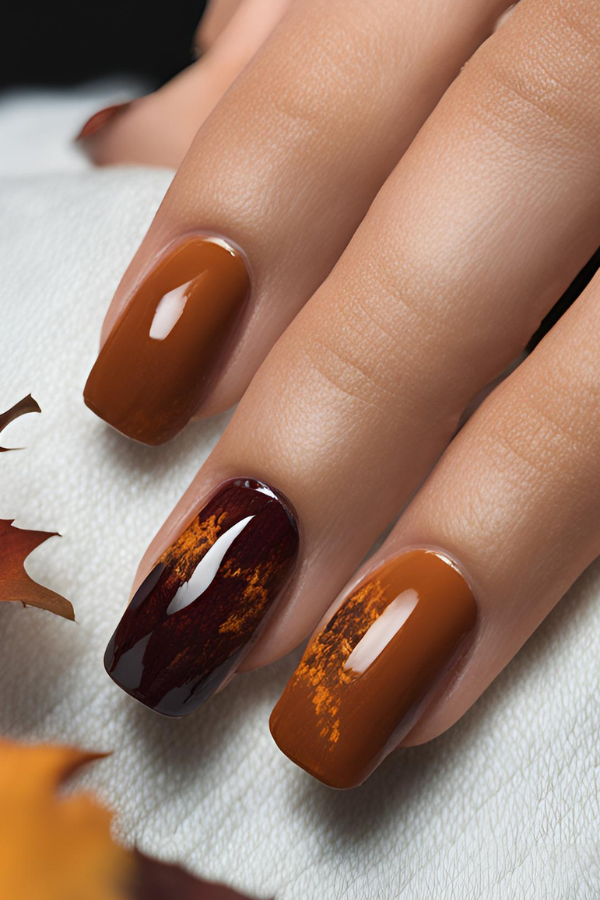
    Begin with a base coat of warm brown or a deep orange polish to set the autumnal mood. Once dry, use a fine-tip brush to draw leaf patterns. You can either draw a single detailed leaf on a feature nail or small leaves scattered across all nails, using colors like yellow, red, and green for contrast. Seal your artwork with a clear top coat to protect it and add a glossy finish. This design not only celebrates the essence of fall but also looks elegant on short nails.

    2. Leaf Patterns

    10 Stunning Fall Nail Designs
    Take inspiration from the humble leaf and bring a sense of whimsy and elegance to your talons.

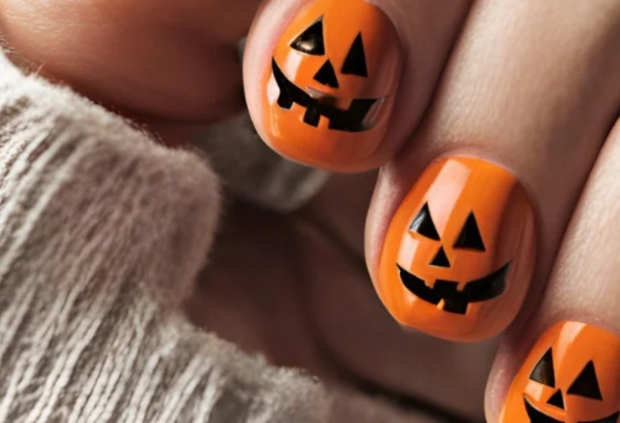
    3. Easy Pumpkin Nail Art

    10 Stunning Fall Nail Designs
    To recreate these pumpkins, you will need a black and orange nail polish and a fine tip brush for details.

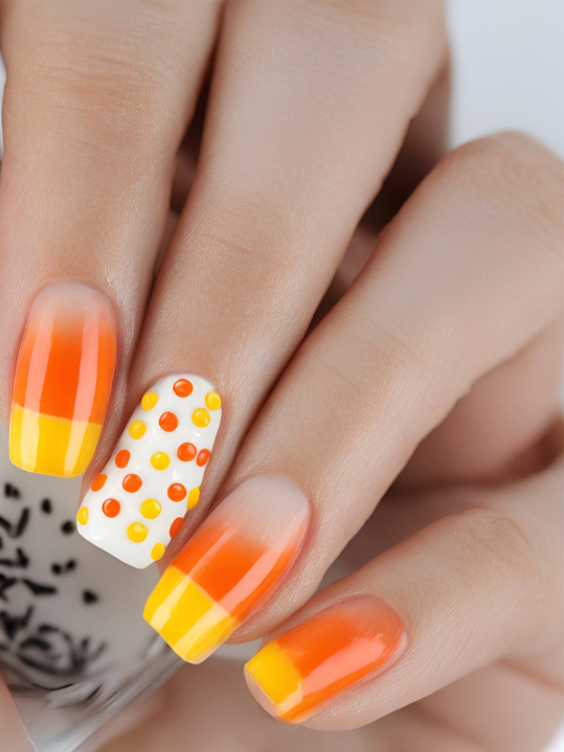
    4. Candy Corn Dotticure
    10 Stunning Fall Nail Designs
    A dotticure is perfect when you want to incorporate a couple of colors on your nail. This design is inspired by the sweet candy corn colors and call be worn at anytime throughout fall. You’ll need yellow, orange and white nail polish as well as a dotting tool and toothpick for the smaller dots. You can use a sponge to create the ombre effect on the other nails.

    5. Cozy Sweater Textures

    10 Stunning Fall Nail Designs
    Create cozy sweater textures by using a nail stamping kit with a sweater pattern or by manually drawing a knit pattern with a fine-tip brush. Opt for classic fall colors like cream, grey, or soft pastel tones. For an edgy look, paint your nails black, adding accents of gold or burnt orange for a hint of autumn. You can add geometric designs or thin, elegant stripes in these accent colors to incorporate a modern twist.

    6. Edgy Black

    10 Stunning Fall Nail Designs
    Since Halloween occurs during fall, it’s the perfect time to vamp up your manicure with a spook-over. Opt for nail polishes in shades of black and gold with accents of burnt orange.

    7. Elegant Marble Effects
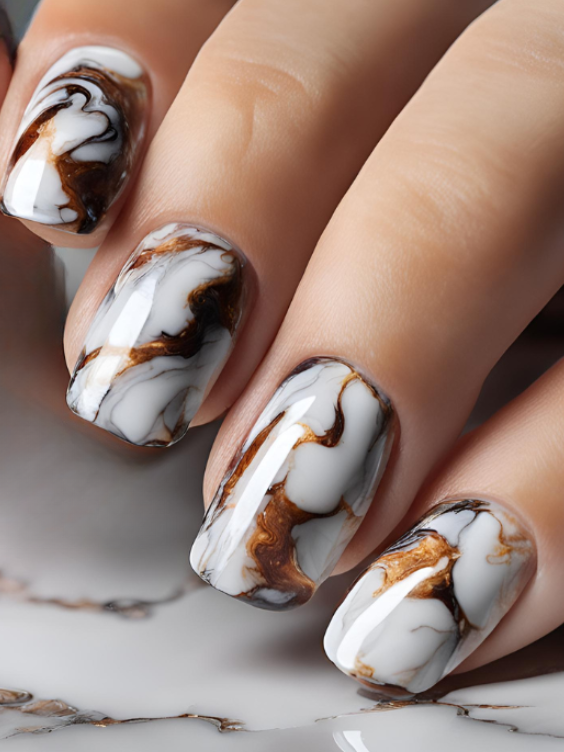
    10 Stunning Fall Nail Designs
    Marble nail designs are a chic and timeless option that adds a touch of luxury to your manicure. The intricate swirls and patterns create a stunning visual effect that will leave your nails looking elegant and refined. Experiment with different color combinations, such as soft pastels or bold metallics, to achieve a unique and eye-catching look.

    8. Leopard Print
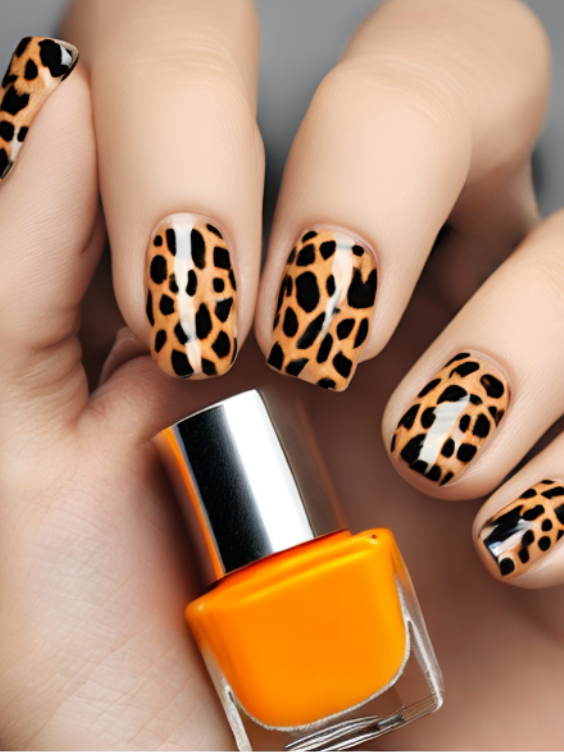
    10 Stunning Fall Nail Designs
    For a trendy and playful nail design – opt for leopard print. Start with a base of orange and then freehand the black irregular spots that typically frequent the leopard.

    9. Bold Geometric Shapes
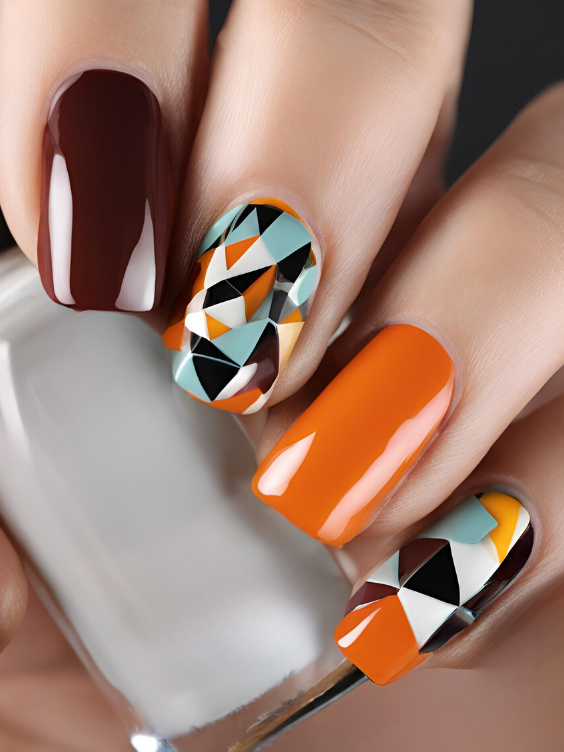
    10 Stunning Fall Nail Designs
    Channel your inner artist and play with lines, angles, and patterns to create eye-catching nail designs that demand attention. From modern minimalist designs to intricate geometric patterns, the possibilities are endless.

    10. Falling Leaves

    10 Stunning Fall Nail Designs
    Go for a more minimalist look with a base coat of white and some delicate leaves thoughtfully placed around the edges of the nails.
    Perfecting Small Details

    Mastering the art of small details on short nails can transform your DIY manicure from simple to spectacular, even with limited space. Here are a few tips to enhance the precision of your nail art:

    – Use a Fine Tip Brush: For detailed designs like leaf patterns or leopard spots, a fine tip brush is essential. It allows for precise strokes and helps in maintaining the integrity of small features.

    – Steady Your Hand: Rest your hand on a flat surface while painting to keep it stable. This reduces smudges and uneven lines, making intricate designs sharper.

    – Keep It Simple: With short nails, less is often more. Opt for designs that complement the nail’s size, such as small dots, thin lines, or simple shapes. Overloading a small canvas can make the design look cluttered.

    – Work in Layers: Allow each layer to dry completely before applying the next. This prevents colors from bleeding into one another, keeping each detail distinct and neat.

    Long-lasting Application

    Ensuring your fall nail art stays vibrant and chip-free can make all the difference in maintaining a professional-looking manicure longer. Here are some effective strategies:

    – Proper Nail Preparation: Before you start painting, prepare your nails properly. Clean them thoroughly, push back the cuticles, and buff the nail surface lightly. This prep work helps the nail polish adhere better and last longer.

    – Base Coat is Key: Always apply a clear base coat. It protects your nails from staining, particularly with dark or highly pigmented colors, and helps the polish stick to the nail.

    – Thin Layers: Apply your nail polish in thin, even layers. Thick layers take longer to dry and are more prone to chipping. Two thin layers are better than one thick layer.

    – Top Coat for Protection: Finish with a clear top coat to seal in your design. A good top coat not only adds a gloss finish but also extends the wear of your nail art by preventing chips.

    – Regular Touch-Ups: Even with all the proper steps, chips might happen. Keep a small brush dipped in polish remover handy to clean up any smudges or overflow around the edges of the nail. Touch up with a thin layer of top coat every few days to keep your nails looking fresh.

    Whether you’re a first-time DIY’er or a seasoned nail artist, mastering these techniques will ensure your autumn nail designs remain as enduring as they are beautiful. Enjoy expressing your seasonal spirit right at your fingertips!

    Also see simple ideas for wedding nails 

    smell my feet printable gift tag
    #alt_tag

    See printable tag on Etsy

    xmas trivia question 3
    xmas trivia question 2
    See Answers to the Daily Quiz Question

    Leave a Reply

    Your email address will not be published. Required fields are marked *